Pruning
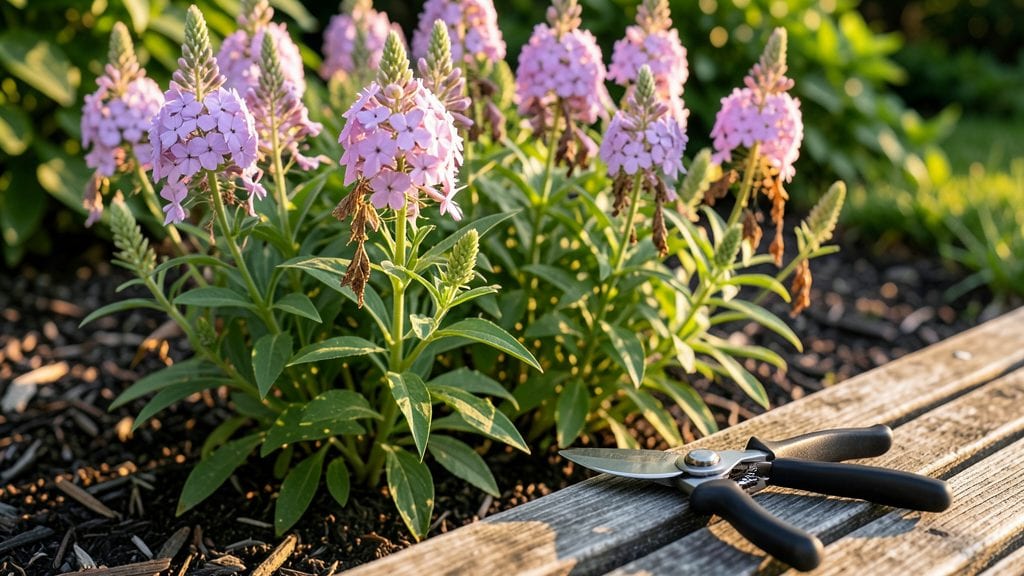
Deadheading garden phlox isn’t just tidying up—it’s the secret to nonstop blooms all summer. ✨ I’ve watched my phlox go from a single flush of flowers in June to a lush, continuous display through September, just by spending 10 minutes every few days with a sharp pair of scissors.
The key is timing: you’ve got to snip before the seed heads form, or your plant will redirect energy into making seeds instead of new flowers.
You’ll need clean pruners (or even your fingernails work in a pinch), gardening gloves for those thorny stems, and a bucket of water nearby—phlox hates having freshly cut stems left on the ground.
The best time to deadhead is early morning, when the blooms are still crisp and the stems are firm. Grab a handful of spent flowers, give them a sharp cut just above a set of healthy leaves, and watch your plant respond within days with fresh buds.
What you’ll end up with is a phlox bush that looks fuller, blooms longer, and stays vibrant until frost. The flowers stay bright and abundant instead of turning brown and leggy, and you’ll avoid the disappointment of a single, sad bloom cycle.
Just don’t wait too long—once those seed heads form, it’s too late for that season’s new flowers. Think of it like giving your phlox a second chance every week.
Works for all phlox varieties—dwarf, tall, or trailing—and adapts to any garden bed or container. Once you see the difference, you’ll never let a single spent bloom linger. Here’s how to do it right the first time.
📚 In This Guide
- What you need
- Instructions
- Tips and common mistakes
- Wrapping up and next steps
What you need
- ● Pruning shears: Sharp, bypass-style shears (4–6" blades) for clean cuts—avoid anvil shears to prevent crushing stems.
- ● Gloves: Heavy-duty gardening gloves (nitrile-coated for grip) to protect hands from thorns and sap.
- ○ Disinfectant (optional but recommended): 70% isopropyl alcohol or a gardening-specific disinfectant to wipe down tools between cuts.
- ● Trash bag or bucket: A small kitchen-sized bag or 5-gallon bucket for spent blooms.
- ○ Water spray bottle (optional): For a quick rinse of tools or dusty foliage.
- ● Timing: Deadhead on a dry, overcast day or early morning to reduce stress on plants.
- ● Weather check: Wait until no rain is forecasted for 24 hours to prevent fungal issues.
- ● Plant health: Focus on fully bloomed, spent flowers—avoid cutting green buds!
How to deadhead garden phlox for longer, healthier blooms
This simple technique keeps your phlox flowering all summer long—just follow my timing and tool tricks.
✂️ Step 1: Pick the Right Time to Trim
Wait until after the flower cluster fully opens but before seeds form—that’s your sweet spot for deadheading. I check daily in peak bloom season because once those seed heads turn brown, the plant redirects energy to seed production instead of new flowers. You’ll know it’s time when the center petals start dropping naturally.
Never cut into fresh buds—those are your future blooms. I grab my pruners and look for clusters where at least 70% of petals have fallen. This ensures I’m not removing potential flowers while still encouraging more blooms to develop.
✂️ Step 2: Use the Correct Cutting Technique
Make your cut just above the first set of healthy leaves below the spent bloom. This encourages new growth from that node. I angle my pruners slightly upward to prevent water from pooling on the cut stem, which could cause rot. A clean cut at a 45-degree angle also looks better and heals faster.
Don’t hack off the entire stem—you’ll leave the plant looking ragged. Instead, target only the spent flower clusters and leave the rest of the stem intact. This keeps the plant’s structure strong while redirecting energy to fresh blooms.
🌿 Step 3: Maintain Plant Health After Trimming
After deadheading, give your phlox a light watering to help it recover. The plant will respond by producing new side shoots from the nodes where you made your cuts. I’ve found that watering in the morning prevents fungal issues and gives the plant a strong start to the day.
Keep an eye out for yellowing leaves or wilting stems—these can signal over-trimming or stress. If you notice too much defoliation, hold off on deadheading until the plant regains its vigor. Healthy phlox will reward you with weeks of continuous blooms if you stay consistent.
⏰ Step 4: Schedule Regular Maintenance
Set a reminder to deadhead every 3-5 days during peak bloom season. Phlox produces flowers in succession, so frequent trimming keeps the plant focused on new blooms rather than seed production. I mark my calendar for Tuesday and Friday mornings—it becomes a quick, rewarding habit.
Don’t let the spent blooms pile up. A single cluster left too long can reduce the overall bloom count by 30% or more. I keep a small bucket nearby to collect the spent flowers—you can compost them later or use them in dried arrangements.
🌱 Step 5: Extend the Blooming Season
To push your phlox into late summer, give it a light fertilizer after the first round of deadheading. A balanced 10-10-10 formula encourages lush, vigorous growth. I apply it in the early morning when the soil is damp, so the nutrients absorb quickly without burning the roots.
Watch for new buds forming along the stems—this is your sign that the plant is responding well. With consistent deadheading and care, your phlox can keep blooming well into September in many climates. Just avoid trimming after mid-August in cooler regions, as the plant needs time to harden off for winter.
Tips & tricks for perfect deadheading garden phlox
A few simple tricks will transform your phlox from a one-time bloom to a summer-long flower powerhouse.
Timing Secret: The 70% petal drop rule is your golden standard—wait until most petals have naturally fallen before trimming, but act quickly once you see those brown seed heads forming. I’ve found that checking my phlox in the morning light makes it easier to spot the perfect clusters to trim. The key is to stay one step ahead of the seed formation—once those brown centers appear, you’ve missed your window for encouraging new blooms.
Tool Technique: Your pruners are more important than you think! Always use clean, sharp pruners to make precise cuts just above the first set of healthy leaves. Dull blades crush stems and create jagged cuts that invite disease. I keep a small bottle of rubbing alcohol nearby to wipe down my pruners between cuts—this prevents cross-contamination between plants. The 45-degree angle isn't just for looks; it actually helps water run off the cut stem, reducing rot risk.
Maintenance Strategy: That 3-5 day schedule isn't arbitrary—phlox produces flowers in succession, so consistent trimming keeps the plant focused on new blooms. I've noticed a dramatic difference when I stick to this schedule versus sporadic trimming. Pro tip: Set a phone reminder for your deadheading days, and make it part of your morning garden routine. The more consistent you are, the more blooms you'll get throughout the season.
Season Extension: The mid-August cutoff is crucial for cooler climates. Phlox needs time to harden off before winter, so avoid trimming after this point even if flowers are still blooming. In warmer zones, you can extend deadheading until frost, but always watch for those new buds forming as your signal to continue. A light application of 10-10-10 fertilizer after your first round of deadheading gives your phlox the boost it needs for that late-summer extension.
Pro Tips for Deadheading Garden Phlox
- A few simple tricks will transform your phlox from a one-time bloom to a summer-long flower powerhouse.
- Timing Secret: The 70% petal drop rule is your golden standard—wait until most petals have naturally fallen before tr...
- Tool Technique: Your pruners are more important than you think! Always use clean, sharp pruners to make precise cuts ...
Frequently asked questions
Got questions about deadheading garden phlox? Here are answers to the most common ones to keep your plants thriving!
When is the best time to deadhead garden phlox?
Deadhead phlox after blooms fade but before seed heads form—typically mid-to-late summer. For late-season varieties, wait until frost threatens to avoid cutting back too early. Consistency is key: aim for every 2–3 weeks during peak bloom.
How much should I trim when deadheading?
Trim back to the first set of healthy leaves or a 50% leaf-to-stem ratio to encourage bushier growth. Avoid over-trimming—never cut more than one-third of the plant at once. Use clean, sharp shears to prevent disease.
What if my phlox stops blooming after deadheading?
If blooms taper off, check for over-pruning, poor soil, or pests. Fertilize lightly with a balanced formula (10-10-10) and ensure full sun (6+ hours/day). If stems are leggy, prune again in early spring to promote new growth.
Can I skip deadheading and still get flowers?
Yes! Phlox can self-seed, but deadheading extends bloom time and prevents floppy, seed-heavy stems. If you’re short on time, focus on removing only the worst-looking blooms—just don’t let them go to seed en masse.
Why do my phlox leaves turn brown after deadheading?
Brown leaves often signal stress from over-pruning or fungal issues (like powdery mildew). Space plants for airflow, water at the base (not leaves), and apply neem oil if mildew appears. Avoid pruning in wet weather to reduce disease risk.
Wrapping up and next steps
Deadheading garden phlox isn’t just about tidying up—it’s your secret weapon for longer, healthier blooms and a showstopping garden all season! 🌸 By snipping spent flowers strategically, you redirect energy to new growth, encourage bushier plants, and even deter pests.
Whether you’re a pruning pro or just starting, a little patience and the right technique will transform your phlox into a nonstop floral powerhouse.
Ready to see the magic? Grab your shears and give it a try this weekend—your garden (and future you) will thank you! For extra confidence, check out our FAQs or revisit your tools to tackle those blooms like a pro.