Container Gardens
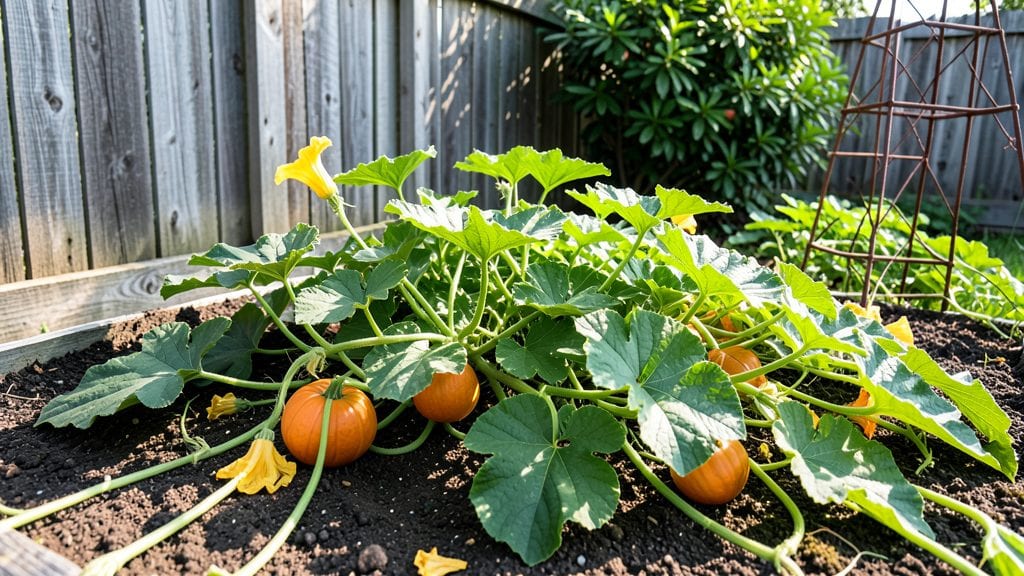
Growing pumpkins in containers turns "too small for pumpkins" into "perfect for pumpkins" with the right varieties and setup. 🌱 I thought container gardening couldn't handle squash, but my Jack Be Little pumpkin produced a 6-pound fruit in a 5-gallon pot last summer—and it wasn't even my biggest container.
The secret lies in dwarf varieties that thrive in limited space while still delivering that classic pumpkin flavor.
You'll need containers at least 5 gallons for small varieties, with drainage holes and sturdy sides to support vines. A sunny spot with 6-8 hours of direct light daily is non-negotiable, and well-draining potting mix with compost keeps roots happy.
Most beginners underestimate how much space vines need—trellising or sprawling mats both work, but plan for 3-5 square feet of ground space per plant.
By midsummer, you'll watch those tendrils climb and flowers appear, leading to mini pumpkins that ripen in 80-90 days. The harvest isn't just about size—these compact varieties pack the same sweet, nutty flavor as their giant cousins, perfect for pies or carving.
Just watch for powdery mildew in humid weather and thin fruits early to avoid overcrowding.
This method works for balconies, patios, or even large windowsills with proper light. The only real challenge is finding containers big enough—repurpose trash cans or half barrels if standard pots feel too limiting. With the right setup, you'll prove that pumpkin season isn't just for backyard gardeners anymore.
📚 In This Guide
- What you need
- Instructions
- Tips and common mistakes
- Wrapping up and next steps
What you need
- ● Container: A large, sturdy pot (at least 5 gallons) with drainage holes. Pro tip: A fabric grow bag or a wooden barrel works great!
- ● Pumpkin seeds: Choose a compact variety like 'Jack Be Little' or 'Miniature Pumpkin' (check seed packets for container suitability).
- ● Potting soil: A high-quality, well-draining container mix (avoid garden soil—it compacts!).
- ● Compost or fertilizer: A balanced, slow-release option (e.g., 10-10-10) or organic compost to feed your pumpkin.
- ● Watering can or hose: With a gentle spray nozzle to avoid disturbing soil.
- ○ Support: A small trellis or cage (optional but helpful for vining varieties).
- ● Gloves (to protect your hands from thorns and soil).
- ● Trowel (for planting and soil adjustments).
- ● Mulch (straw or shredded leaves to retain moisture).
- ● Plant markers (to track varieties if growing multiple pumpkins).
- ● Sunlight spot: A location with 6–8+ hours of full sun daily (critical for pumpkin growth!).
- ● Drip irrigation system (for consistent watering).
- ● Epsom salt (for magnesium boosts if leaves look pale).
- ● Pest control (neem oil or row covers for squash bugs).
Step-by-Step instructions for growing pumpkins in containers
Here's how to grow compact pumpkin varieties in pots—no sprawling vines or massive yard needed.
🌱 Step 1: Choose the Right Compact Variety and Container
Select a miniature or bush-type pumpkin variety like 'Jack Be Little' or 'Minnesota Munchkin'—these stay under 2 feet tall and produce 3-5 pound fruits. Avoid standard pumpkins; their vines will overtake your space in weeks.
Use a 5-gallon container for each plant, with at least 18 inches in diameter. Larger pots (like 7-10 gallons) give you more growing room for bigger varieties. Drill drainage holes in the bottom if they're not already there—pumpkin roots rot quickly in soggy soil.
🌿 Step 2: Prepare the Soil and Plant Seeds
Fill the container with well-draining potting mix mixed with compost for fertility. Avoid garden soil—it compacts and holds too much moisture. Plant 2-3 seeds per container at a depth of 1 inch, spacing them 6 inches apart. Pumpkin seeds germinate best in warm soil (70-90°F).
Water gently after planting to settle the soil, but don’t soak it. Keep the mix evenly moist until germination, which takes 7-14 days. Once seedlings emerge, thin to the strongest one per pot—crowded plants compete for nutrients and produce smaller fruits.
☀️ Step 3: Provide Full Sun and Support for Vines
Pumpkins need full sun (6-8 hours daily)—place containers on a south-facing patio, balcony, or deck. If you’re in a shaded spot, supplement with a grow light for 12-14 hours daily. Without enough light, vines grow weak and fruits stay small.
As vines grow, train them along a trellis or sturdy cage to save space. Use soft plant ties to guide stems upward—pumpkins can get heavy, so secure the trellis to a stable structure. Prune side shoots to focus energy on one main vine per plant for better fruit production.
💧 Step 4: Water and Fertilize for Maximum Yield
Water deeply 2-3 times per week, letting 2-3 inches of soil dry between waterings. Pumpkins are thirsty but hate soggy roots—check soil moisture by sticking your finger 1 inch deep. Yellowing leaves mean you’re overwatering; crisp, wilting leaves mean you’re underwatering.
Feed plants every 2 weeks with a balanced liquid fertilizer (10-10-10 or 20-20-20) once vines start running. Stop fertilizing 3 weeks before harvest—too much nitrogen late in the season delays ripening. Hand-pollinate flowers in the morning by transferring pollen with a small paintbrush if bees aren’t visiting.
⏰ Step 5: Harvest at Peak Ripeness
Pumpkins are ready when their rinds harden and can’t be pierced with a fingernail. For container-grown varieties, harvest 3-5 weeks after flowering, depending on the type. Cut stems with pruners, leaving 2 inches of stem attached—this helps fruits store longer.
Cure pumpkins in a warm, dry place (80-85°F) for 7-10 days to develop their flavor and skin toughness. Store in a cool, dark spot (50-55°F) for 2-3 months. If frost threatens before harvest, move containers indoors to a sunny spot and harvest when fully ripe.
Tips & tricks for perfect container-grown pumpkins
Small-space gardening doesn't mean sacrificing pumpkin dreams—here's how to maximize your container harvest with these game-changing tips.
Variety Selection Matters: In Step 1, when choosing your compact variety, prioritize those labeled as "bush-type" or "miniature" like 'Jack Be Little'—these are specifically bred for container growth. I learned this the hard way after trying a regular pumpkin variety that sent vines climbing 15 feet up my balcony railing! The key is looking for varieties that stay under 2 feet tall while still producing 3-5 pound fruits—perfect for carving or cooking.
Soil Temperature is Critical: In Step 2, those warm soil temperatures (70-90°F) are non-negotiable for germination. If your spring evenings are still chilly, consider using a seedling heat mat ($15 at garden centers) to maintain that ideal range. I've seen germination times stretch to 21 days when soil stays below 65°F—patience wears thin when you're waiting for those little sprouts to appear!
Support System Strategy: When training vines in Step 3, don't just throw up any old trellis. Use a heavy-duty metal cage (like those designed for tomatoes) or a wooden A-frame trellis secured to your balcony railing with sturdy zip ties. Pumpkins can get surprisingly heavy—those 5-pound fruits will test even the strongest plastic trellises. I recommend adding support within 2 weeks of planting when vines start getting leggy.
Watering Wisdom: The 2-3 times per week guideline in Step 4 can be tricky with containers. Check moisture by sticking your finger 1 inch deep—if it feels dry, water thoroughly until it runs out the drainage holes. Here's my pro tip: Use a moisture meter ($10 at hardware stores) for the first few weeks to get a feel for your specific container's drying rate. Overwatering is the #1 killer of container pumpkins—roots rot faster in confined spaces.
Pro Tips for Container Garden Pumpkin
- Small-space gardening doesn't mean sacrificing pumpkin dreams—here's how to maximize your container harvest with these game-changing tips.
- Variety Selection Matters: In Step 1, when choosing your compact variety, prioritize those labeled as "bush-type" or "miniature" like 'Jack Be Little'—these are specifically bred for container growth.
- Soil Temperature is Critical: In Step 2, those warm soil temperatures (70-90°F) are non-negotiable for germination.
Frequently asked questions
Got questions about growing pumpkins in containers? You're not alone!
Here are answers to the most common queries to help you grow a thriving container garden pumpkin—even in limited space.
What are the best compact pumpkin varieties for containers?
Look for small-fruited varieties like Jack Be Little, Baby Boo, or Minnesota Honey. These stay under 10 pounds and thrive in 5-gallon containers with proper care. Avoid giant pumpkins—they need massive space!
How long does it take for container pumpkins to mature?
Most compact varieties mature in 75–100 days, depending on sunlight and warmth. Start seeds indoors 2–3 weeks before your last frost, then transplant seedlings into containers for a faster harvest.
Do container pumpkins need special watering?
Yes! Containers dry out quickly. Water deeply 2–3 times per week (more in heatwaves) and ensure pots have drainage holes. Mulch the soil surface to retain moisture and prevent weeds.
How do I protect my container pumpkins from pests?
Use row covers or neem oil to deter squash bugs and aphids. Avoid overwatering (which attracts pests) and inspect leaves regularly. Companion plants like marigolds can also help repel insects.
Can I grow pumpkins in containers year-round?
No—pumpkins need warmth and sunlight. In cold climates, grow them in summer only. In mild zones, extend the season with row covers. Always move containers indoors if frost threatens!
Wrapping up and next steps
Growing container garden pumpkins is a rewarding way to enjoy a bountiful harvest—even in limited spaces! With the right compact varieties and a little care, you’ll soon be savoring homegrown pumpkins for pies, roasting, or decorating. 🎃
Ready to dive in? Start by sketching your container setup and selecting your favorite small-space pumpkin variety. Then, gather your supplies and follow the steps to create a thriving mini pumpkin patch. Happy gardening—and may your harvest be plentiful! 🌱