Picking
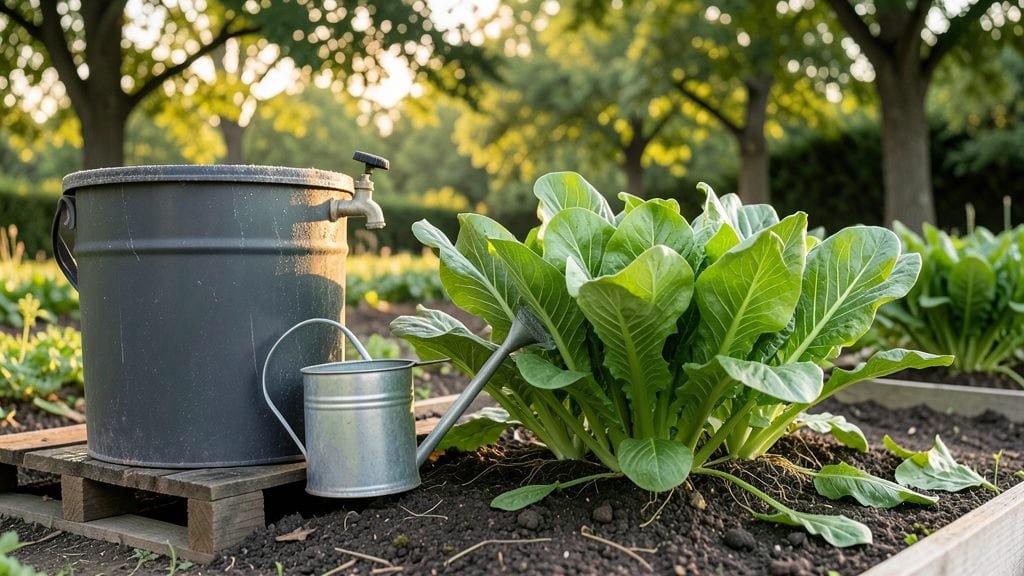
My rainwater harvesting garden transformed my yard from thirsty to thriving—no extra water bills or drought stress. 🌱 The key was pairing a simple barrel system with drought-smart plants that drink deeply but rarely.
I’ll show you how to design a layout that captures every drop while keeping your garden lush and low-maintenance.
You’ll need just a few basics: a sturdy rain barrel, a first-flush diverter to keep debris out, and some strategic piping to distribute water where it matters most.
The setup takes under an hour, and the payoff is immediate—plants like lavender, yarrow, and Texas sage stay vibrant even through dry spells. No more begging the hose for mercy every July.
Picture this: morning dew clinging to silver-blue foliage, the earthy scent of damp soil after a storm, and a garden that outlasts summer heat without a single sprinkler run. This system cuts water use by up to 70% while inviting pollinators and reducing runoff.
The best part? It works for balconies, backyards, or even container setups—no green thumb required.
We’ll cover placement tricks (like positioning barrels near high-traffic plant zones) and plant pairings that maximize water efficiency. Whether you’re going full DIY or hiring help, this setup adapts to any space. Ready to turn every rainfall into garden gold?
📚 In This Guide
- What you need
- Instructions
- Tips and common mistakes
- Wrapping up and next steps
What you need
- ● Rainwater Collection System: 1-2 gutter guards (to prevent debris clogging)
- ● 1 downspout diverter (to redirect water to your storage)
- ○ 1 first-flush diverter (optional but recommended to filter out initial contaminants)
- ● Storage Solutions: 1-2 food-grade barrels (55-100 gallons each, with tight lids)
- ● OR 1 underground cistern (for larger setups, 200+ gallons)
- ● 1 barrel stand or pallet (to elevate storage and prevent stagnation)
- ● Filtration & Safety: 1 mesh screen or fine filter (for debris removal)
- ● 1 water testing kit (to check pH and contaminants)
- ● 1 bleach or water treatment tablets (for occasional sanitization)
- ● Irrigation Setup: 1 drip irrigation kit (with emitters for precise watering)
- ● OR 1 soaker hose (for slow, deep watering)
- ● 1 timer or manual valve (to control water flow)
- ● Required: A slightly sloped garden area (for natural water flow)
- ● Access to a roof or hard surface (for rainwater runoff)
- ● Drought-tolerant plants (e.g., succulents, lavender, or native species)
- ○ Optional (but helpful!): 1 rainwater gauge (to track collection efficiency)
- ● 1 solar-powered pump (for larger gardens)
- ● Mulch or swales (to retain moisture in soil)
- ● Decorative stones or pebbles (to enhance aesthetics)
Step-by-Step guide to designing your rainwater harvesting garden
Here's how to create a water-wise garden that stays lush without wasting a drop.
🌱 Step 1: Select Drought-Tolerant Plants for Your Climate
Start by choosing plants that naturally thrive with minimal water. Native species are your best bet—they've already adapted to your region's rainfall patterns. For example, lavender, sedum, and Russian sage need very little once established, while succulents like hens-and-chicks store water in their leaves.
Check your USDA hardiness zone to match plants with your local conditions. I always cross-reference with local nursery recommendations, as microclimates can vary even within the same zone. Group plants with similar water needs together to simplify irrigation. You'll see healthier growth and fewer dry patches in your garden when plants are properly matched.
💧 Step 2: Install a Simple Rainwater Collection System
Set up a basic system using a 55-gallon rain barrel connected to your downspout. Position it on a sturdy stand or elevated platform to allow gravity-fed distribution. I like to place mine under the downspout of my largest roof surface—usually the kitchen or bathroom—to maximize collection.
Add a first-flush diverter to the barrel to filter out the first dirty water that runs off roofs. This simple plastic attachment costs under $20 and prevents sediment buildup that would clog your irrigation system. You'll notice cleaner water after the initial rain, and your plants will thank you with fewer algae issues in the watering system.
☀️ Step 3: Design Your Garden Layout for Water Efficiency
Create a swale system—shallow trenches that guide water to plant roots—around your drought-tolerant perennials. These gentle contours slow water flow and allow it to soak into the soil gradually. I typically dig swales about 6 inches deep and 12 inches wide, shaping them like shallow half-moons around plant clusters.
Place thirstier annuals like sunflowers or zinnias in the highest areas where they'll catch overflow from the swales. Mulch heavily with 2-3 inches of wood chips around all plants to lock in moisture. The mulch will darken as it breaks down, signaling it's working to protect your soil from evaporation.
✂️ Step 4: Implement a Drip Irrigation Network
Connect your rain barrel to a low-volume drip irrigation system using ¼-inch tubing. Run the main line along the back of plant beds and install emitters every 12-18 inches for even distribution. I always use pressure regulators to prevent clogging from sediment in the harvested water.
Set emitters to deliver ½ gallon per hour to each plant zone. You'll see water slowly seep into the soil rather than puddle on the surface, which means less waste and healthier roots. For container plants, use micro-spray emitters that deliver a gentle mist directly to the soil surface.
🪴 Step 5: Maintain Your System for Long-Term Success
Clean your rain barrel every spring and fall to remove debris and algae. I use a 5-gallon bucket with a long-handled brush to scrub the interior, then refill with fresh rainwater. Add a barrel screen to prevent future buildup—it's a small investment that saves hours of maintenance.
Monitor your plants' moisture needs monthly by checking soil depth with your finger. If the top 2 inches feel dry, it's time to water. You'll develop a feel for your system's efficiency over time, and your garden will show it with vibrant, healthy growth even during dry spells.
Tips & tricks for perfect rainwater harvesting garden
Here's what I've learned after designing multiple water-wise gardens—these tricks make all the difference in creating a thriving, drought-proof landscape.
Plant Selection Strategy: In Step 1, when choosing drought-tolerant plants, focus on those with deep root systems like lavender or Russian sage—they naturally access water deep underground. I always research my local native plants first, as they've evolved to thrive with minimal rainfall. For example, yarrow and purple coneflower are excellent choices that attract pollinators while requiring little water once established.
Collection System Optimization: For Step 2, position your 55-gallon rain barrel under the downspout of your largest roof surface, but make sure the roof is clean and free of leaves or debris before the first rain. I've found that connecting two barrels in series doubles my water collection capacity. Also, consider adding a mesh screen over the barrel's opening to prevent mosquito breeding while still allowing rainwater to enter.
Swale Design Tips: When creating your 6-inch deep swales in Step 3, shape them slightly concave rather than straight lines. This creates micro-reservoirs that hold water longer. I like to line swales with landscape fabric before filling with soil to prevent clogging from organic matter. For small gardens, you can even create swales with a simple shovel rather than renting heavy equipment.
Long-Term Maintenance: In Step 5, I've found that adding a small amount of hydrogen peroxide (about 1 tablespoon per gallon) to your rain barrel during spring cleaning helps prevent algae growth. Also, consider installing a rain gauge near your garden to track precipitation—this helps you adjust watering needs based on actual rainfall rather than guesswork. The top 2 inches of soil being dry is your best indicator, but a gauge gives you precise data.
Pro Tips for Rainwater Harvesting Garden
- Here's what I've learned after designing multiple water-wise gardens—these tricks make all the difference in creating a thriving, drought-proof landscape.
- Plant Selection Strategy: In Step 1, when choosing drought-tolerant plants, focus on those with deep root systems like lavender or Russian sage—they naturally access water deep underground.
- Collection System Optimization: For Step 2, position your 55-gallon rain barrel under the downspout of your largest roof surface, but make sure the roof is clean and free of leaves or debris before the first rain.
Frequently asked questions
Got questions about rainwater harvesting in your garden?
You’re not alone! Here are answers to the most common concerns—so you can drought-proof your space with confidence.
How much rainwater do I need to collect before it’s useful for my garden?
Even small amounts help! A 50-gallon barrel can collect water from just 0.5 inches of rain on a 10’x10’ roof. Start with a basic setup—every drop counts, especially during dry spells. For larger gardens, scale up with multiple barrels or a cistern.
Can I use rainwater on all plants, or are some better suited for it?
Most plants thrive with rainwater, but avoid using it on acid-loving plants (like blueberries or azaleas) unless your roofing material (e.g., asphalt) won’t alter pH too much. Drought-tolerant natives, succulents, and herbs (like rosemary or thyme) are ideal—they’re built for irregular watering!
What should I do if my rainwater looks dirty or has debris?
First, skimming off scum and emptying sediment every few months keeps things clean. For finer filtration, add a mesh screen or first-flush diverter to block leaves and dust. If algae grows, a 5-gallon bleach solution (1 tsp per gallon) every 6 months can help—just rinse the barrel afterward!
Is rainwater harvesting worth it if I already have a well or city water?
It reduces water bills by 50–70% for irrigation, cuts stormwater runoff (protecting local ecosystems), and gives you chemical-free water for plants. Even a small setup pays off—plus, many areas offer rebates or tax incentives for sustainable water use.
How long does a rainwater harvesting system last?
A well-maintained system (cleaned annually, checked for leaks) can last 10–20+ years. Barrels should be replaced every 5–10 years due to UV degradation, while larger cisterns (with proper coatings) may last decades. Stainless steel or food-grade plastic options are the most durable.
Wrapping up and next steps
Creating a rainwater harvesting garden isn’t just a smart move—it’s a sustainable one! 🌱 By selecting drought-proof plants and leveraging collected rainwater, you’re not only conserving resources but also fostering a resilient, low-maintenance outdoor space. Whether you’re a seasoned gardener or just starting, every drop counts toward a greener future.
Ready to take the next step? Start small—plant a few hardy species, set up a simple rain barrel, and watch your garden thrive with minimal effort. The earth (and your water bill) will thank you!